
For those new to home maintenance or looking to streamline their routine, this comprehensive guide will walk you through the step-by-step process of changing common household filters, paving the way for fresher, cleaner air.
Understanding Your Home’s Filtration Landscape
Before you begin, take a moment to identify the different types of filters in your home. Common culprits include:
- HVAC Filters: Typically located in your furnace or air handler unit, these are often flat, pleated filters.
- Vacuum Cleaner Filters: These vary depending on the model and can be bags, canisters with filters, or HEPA filters.
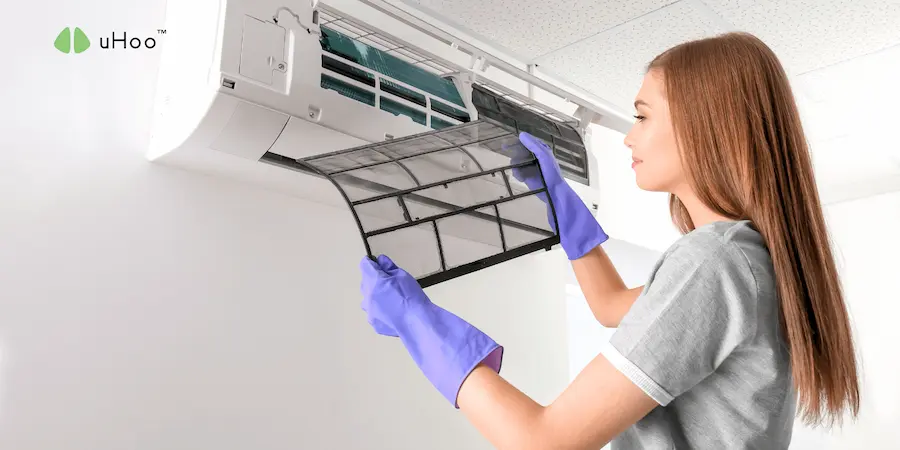
- Air Purifier Filters: These are specific to your air purifier model and can include pre-filters, activated carbon filters, and HEPA filters.
- Kitchen Exhaust Fan Filters: Usually metallic mesh or charcoal filters located beneath your range hood.
Refer to the appliance manuals for the exact location and type of filter for each system.
Step-by-Step Guide to Changing Common Filters
-
Safety First: Power Down
Before handling any filters, always turn off the power to the appliance. For your HVAC system, switch off the breaker in your electrical panel. For vacuum cleaners and air purifiers, unplug them from the wall. This prevents any accidental electrical hazards during the process.
-
Locate the Filter Compartment
Refer to your appliance manual for the exact location of the filter compartment.
- HVAC: Look for a slot or door on the side or bottom of your furnace or air handler. It usually has clips or latches.
- Vacuum Cleaner: The filter location varies greatly. Consult your manual; it might be in the dustbin compartment, near the motor, or at the exhaust.
- Air Purifier: The filter compartment is usually a removable panel on the side or back of the unit.
- Kitchen Exhaust Fan: These filters are typically located underneath the hood and may slide out or be held in place by clips.
-
Identify and Note the Old Filter
Once you’ve located the filter, carefully remove it. Pay attention to the following:
- Size: Note the dimensions (length, width, and thickness) printed on the filter frame. This is crucial for selecting the correct replacement.
- Type/Rating: For HVAC filters, note the MERV (Minimum Efficiency Reporting Value) rating. A higher MERV rating indicates better filtration of smaller particles. Stick to the manufacturer’s recommendations or consult an HVAC professional if you’re unsure about upgrading. For air purifier filters, note the specific type (e.g., HEPA, activated carbon).
- Orientation: Observe the arrow printed on the side of the filter indicating the direction of airflow. The new filter must be installed with the arrow pointing in the same direction.
-
Dispose of the Old Filter Properly
Wrap the dirty filter in a plastic bag to prevent the trapped dust and allergens from escaping during disposal. Dispose of it according to your local waste management guidelines.
-
Select the Correct Replacement Filter
Using the notes you took from the old filter, purchase the exact replacement. Ensure the dimensions, type, and MERV rating (for HVAC) match. Using the wrong size or type can reduce efficiency or even damage your appliance.
-
Install the New Filter
Carefully insert the new filter into the compartment, ensuring it’s facing the correct direction (following the airflow arrow). Make sure it fits snugly without being forced.
- HVAC: Slide the new filter into the slot until it’s secure. Close and latch the access door.
- Vacuum Cleaner: Install the new filter according to your vacuum’s manual. This might involve twisting, snapping, or placing it in a specific housing.
- Air Purifier: Insert the new filter(s) into their designated slots within the unit. Ensure all panels are securely closed.
- Kitchen Exhaust Fan: Slide the clean or new filter back into place and secure any clips.
-
Power Up and Reset (If Necessary)
Once the new filter is securely installed, restore power to the appliance by flipping the breaker back on (for HVAC) or plugging it back in. Some air purifiers have a filter replacement indicator light that may need to be reset according to the manual.
-
Mark Your Calendar
Note the date of the filter change. This will help you establish a regular replacement schedule. A general guideline for standard HVAC filters is every 1-3 months, but this can vary based on usage and air quality. Refer to your appliance manuals for specific recommendations.
The Smart Air Quality Check: Leveraging uHoo
While diligently changing your filters is a significant step towards cleaner air, understanding the real-time impact on your indoor environment can provide further insights. A uHoo air quality monitor can be an invaluable tool in this regard. By continuously tracking particulate matter (PM2.5 and PM10), which includes dust, allergens, and other airborne pollutants that your filters are designed to capture, uHoo provides tangible data on your air quality.
After changing your filters, monitor your uHoo readings. A noticeable decrease in particulate matter levels indicates that your new filter is effectively doing its job. Conversely, consistently high readings, even after regular filter changes, might suggest other sources of indoor pollution or the need for a higher-efficiency filter. uHoo empowers you to proactively manage your indoor air quality, ensuring that the simple act of changing your filters translates into a truly healthier and more comfortable home environment for you and your family.