This detailed guide will walk you through the proper way to change your home’s filters, transforming your indoor environment from potentially grimy to consistently gleaming with cleaner air.
Step 1: The Detective Work – Identifying Your Home’s Filtration Points
Your first mission is to locate all the filters within your home. Common locations include:
- HVAC System (Heating, Ventilation, and Air Conditioning): This is often a rectangular, pleated filter slid into a slot near your furnace or air handler.
- Vacuum Cleaner: Filter locations vary widely by model. Consult your owner’s manual. You might find them near the dustbin, the motor, or as a post-motor exhaust filter (often HEPA).
- Portable Air Purifiers: These usually have a removable panel revealing one or more filters, which can include pre-filters, activated carbon filters, and HEPA filters.
- Kitchen Exhaust Fan (Range Hood): Look underneath the hood for metallic mesh filters designed to trap grease, and sometimes charcoal filters for odor removal.
- Dehumidifiers and Humidifiers: Some models have filters to remove dust and minerals from the air or water.
Take a walk around your home and make a mental (or actual) note of each filter location.
Step 2: The Identification Process – Knowing What to Replace
Once you’ve located your filters, the next crucial step is identifying their type and size.
- Visual Inspection: Carefully examine the existing filter. Note its dimensions (length, width, and thickness), often printed on the frame. For HVAC filters, look for the MERV (Minimum Efficiency Reporting Value) rating – a higher number generally means better filtration. For air purifier filters, note the specific type (e.g., “HEPA,” “Activated Carbon”).
- Consult the Manual: Your appliance’s owner’s manual is your best friend here. It will specify the exact filter type and size required for optimal performance. Keep these manuals in an easily accessible place.
- Take a Photo: A quick photo of the old filter’s label can be a handy reference when you’re at the store or ordering online.
Step 3: The Procurement Phase – Acquiring the Right Replacements
With your filter information in hand, it’s time to purchase replacements.
- Hardware Stores and Home Improvement Centers: These often carry a wide range of standard-sized HVAC filters and some common vacuum and air purifier filters.
- Online Retailers: Offer a vast selection, including specialized filters for specific appliance models. Be sure to order the exact size and type.
- Appliance Manufacturers: For unique or high-efficiency filters, you might need to order directly from the manufacturer’s website.
Step 4: The Replacement Ritual – A Step-by-Step Guide
Now for the hands-on part. Remember to prioritize safety by turning off and unplugging the appliance before handling any filters.
- Access the Filter Compartment: Open the designated access panel or door for the filter. This usually involves clips, latches, or screws.
- Remove the Old Filter: Carefully slide or lift out the old filter. Note its orientation, especially the airflow arrow on HVAC filters – the new one needs to go in the same way.
- Prepare the Area: Use a vacuum cleaner with a hose attachment to gently clean the filter compartment, removing any loose dust or debris that might have accumulated.
- Insert the New Filter: Align the new filter with the compartment, ensuring the airflow arrow (if applicable) points in the correct direction. Slide it in gently until it fits snugly.
- Secure the Compartment: Close and latch or screw the access panel back into place.
- Mark Your Calendar: On the new filter (if possible) or in your home maintenance log, note the date of replacement. This will help you stay on track for future changes.
Step 5: Establishing a Sustainable Schedule – The Key to Long-Term Clean Air
Regular filter replacement is crucial. Here are general guidelines, but always refer to your appliance manuals:
- HVAC Filters: Every 1-3 months, more frequently during peak heating or cooling seasons or if you have pets or allergies.
- Vacuum Cleaner Filters: Varies by model; consult your manual. Some are washable, others need replacement every 3-12 months.
- Air Purifier Filters: Pre-filters often monthly, activated carbon and HEPA filters every 6-12 months.
- Kitchen Exhaust Fan Filters: Metallic grease filters should be washed monthly; charcoal filters replaced every 3-6 months.
Set reminders on your phone or calendar to ensure you don’t forget.
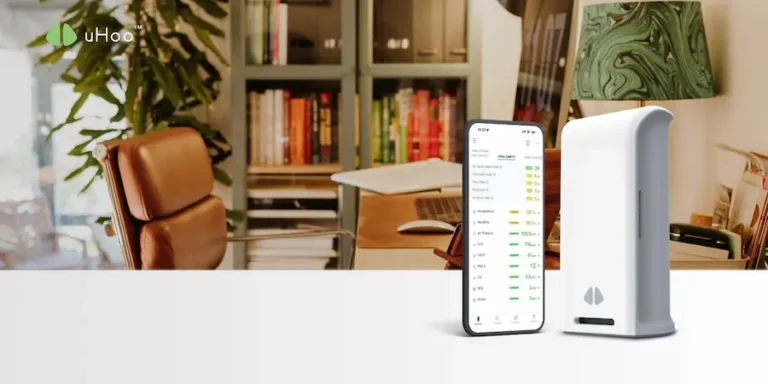
The Smart Air Quality Check: Partnering with uHoo
While diligently changing your filters is a fundamental step towards a healthier home, understanding the actual impact on your indoor air quality can provide valuable insights. A uHoo air quality monitor acts as your personal air quality sentinel. By continuously tracking particulate matter (PM2.5 and PM10), volatile organic compounds (VOCs), temperature, and humidity – all factors influenced by effective filtration – uHoo provides tangible data on the air you breathe.
After you’ve embraced the habit of regular filter changes, monitor your uHoo readings. A noticeable improvement in your air quality metrics will confirm that your efforts are paying off. Conversely, consistently elevated readings, even after filter replacement, might indicate other sources of indoor pollution or the need for higher-efficiency filters. uHoo empowers you to proactively manage your indoor air quality, ensuring that your commitment to filter maintenance translates into a truly cleaner, healthier, and more comfortable home environment for you and your family, moving you from a state of potential grime to a consistent gleam of fresh, breathable air.